Power Apps : Create Generic Notification in your own style and Replace OOB Notification

What is Issue?

Power Apps provides the way to display notification when some operation succeeded or there is any error, warning or just to show some information. We can use Notify() function which displays like banner on top of the app.

But sometime user don’t like this way to show notification. Is there any way to make it more fancy?

The Reason-

We can achieve the fancy Notification using multiple controls like containers, labels. But for each screen it will be repetitive task to implement this on each screen. How we can make it reusable, configurable and more generic?

Solution-

Power Apps has ability to create reusable components using Component Libraries or PCF controls. You can refer the this blog to create reusable Component Libraries.

Let’s see how we can leverage the Component Library and create custom Component.

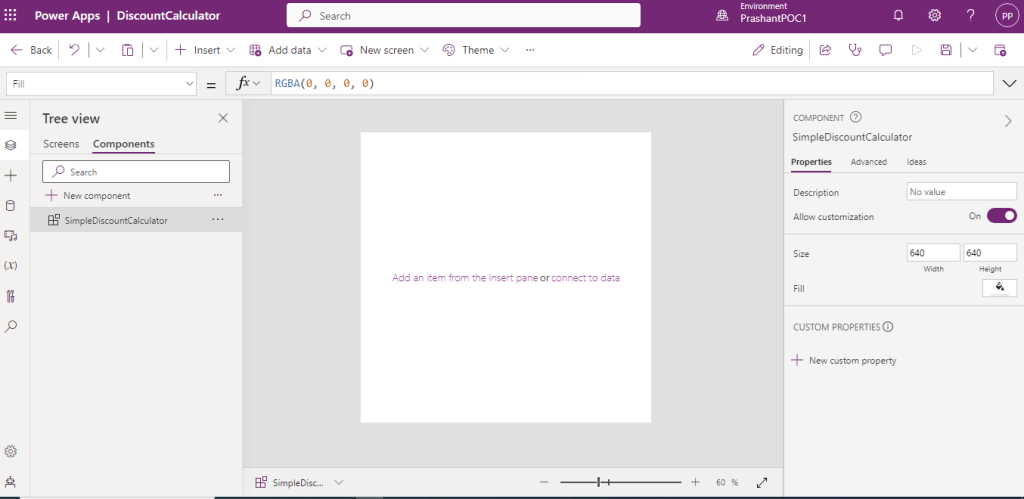
Go to the Components Tab of your Power App in App Editor.

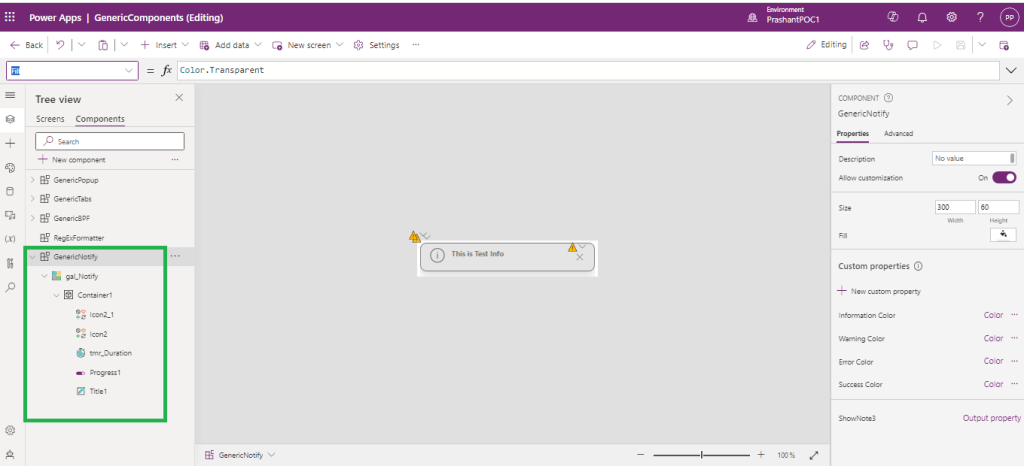
  1. Create new Component “GenericNotify”.
  2. Add Gallery
  3. Add Container in Gallery
  4. Add controls like Icons, timer, Label, etc. in Container.

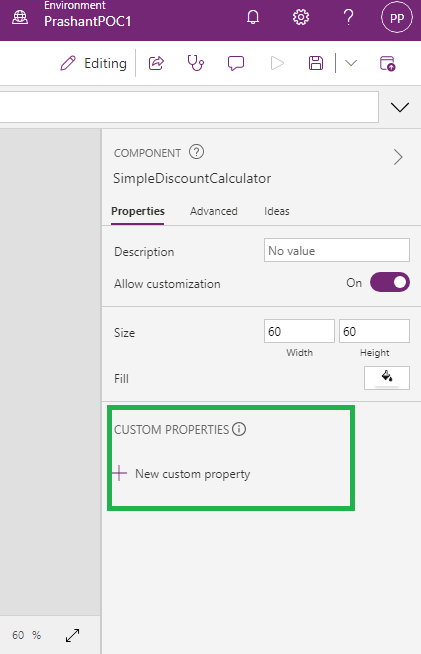
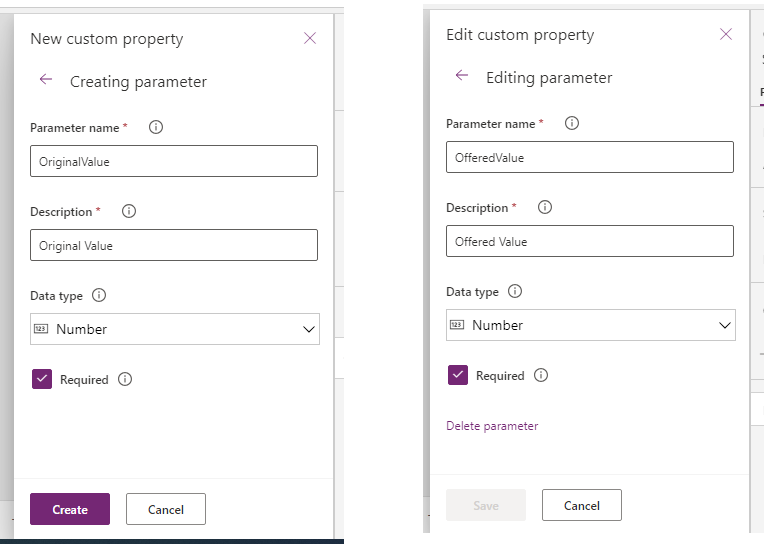
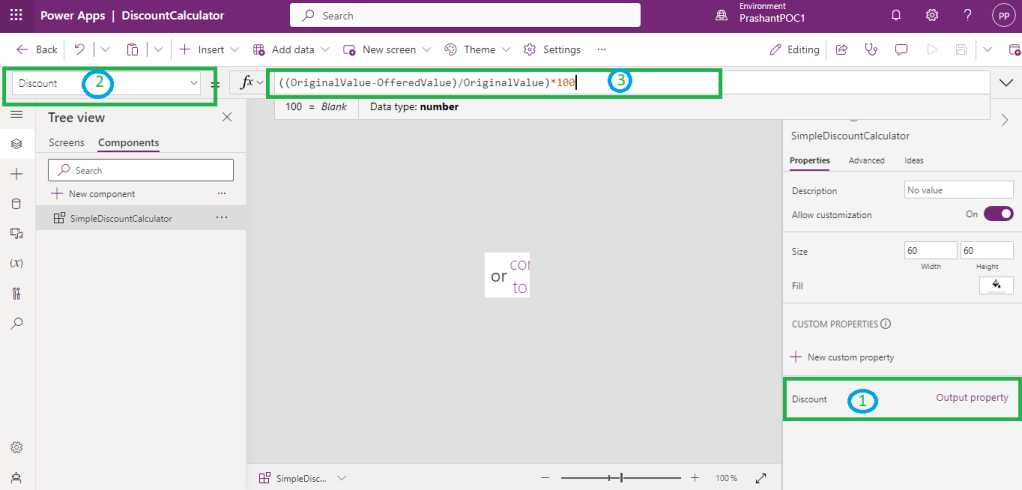
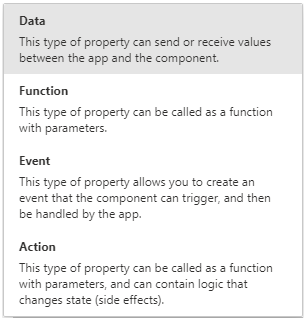
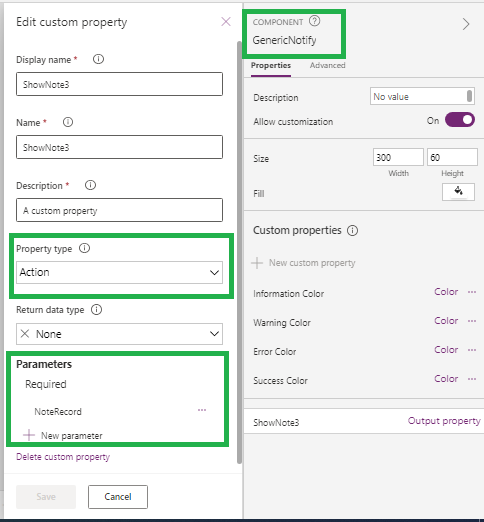
Select GenericNotiy Component and add custom property (Name: ShowNote3, Type : Action) with required Parameter “NoteRecord”(Data Type : Record).

Set NoteRecord with JSON-

{Text:"This is Test Note",Type:"Info",Timeout:5000}

This will ensure the valid Record schema to be set from App where we are going to use this custom control.

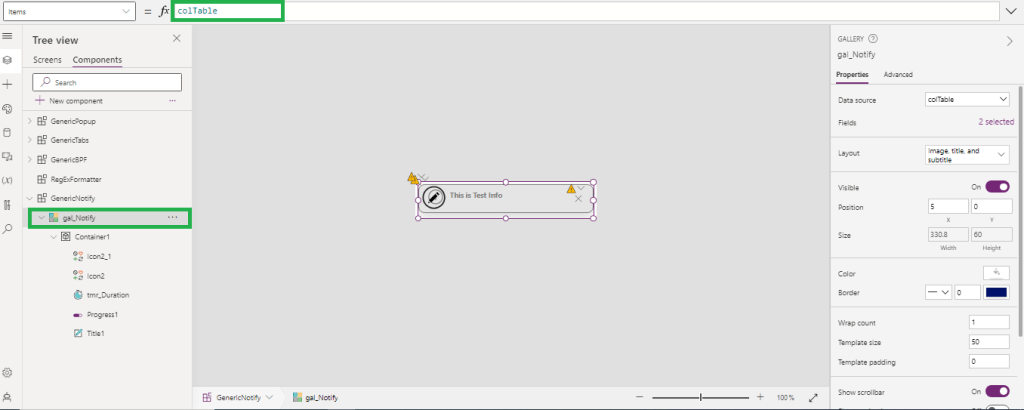
On ShowNote3 custom property, collect the record received in parameter NoteRecord in collection. let’s say colTable.

Now, we have Collection and Collection schema that I can use in the gallery control.

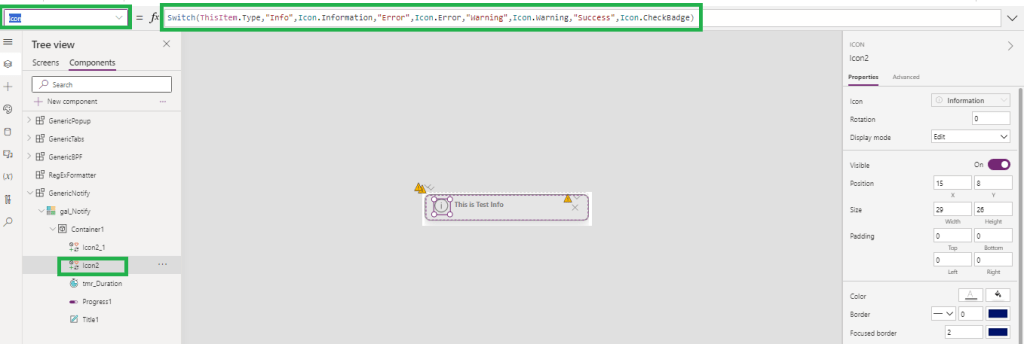
Set the icon and Icon color based on the Notification Type.

For Icon-

Switch(ThisItem.Type,"Info",Icon.Information,"Error",Icon.Error,"Warning",Icon.Warning,"Success",Icon.CheckBadge) 

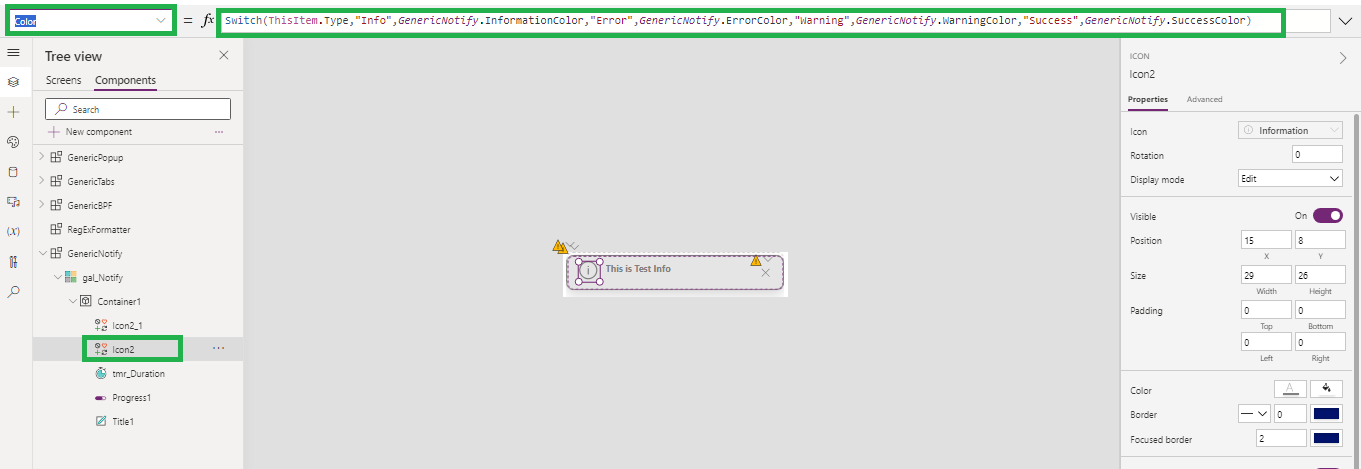
For Color, we can use the custom properties (Type: Input, Data Type :Color) of custom control. (InformationColor, WarningColor,ErrorColor,SuccessColor).

Switch(ThisItem.Type,"Info",GenericNotify.InformationColor,"Error",GenericNotify.ErrorColor,"Warning",GenericNotify.WarningColor,"Success",GenericNotify.SuccessColor)

It makes this notification more configurable from App.

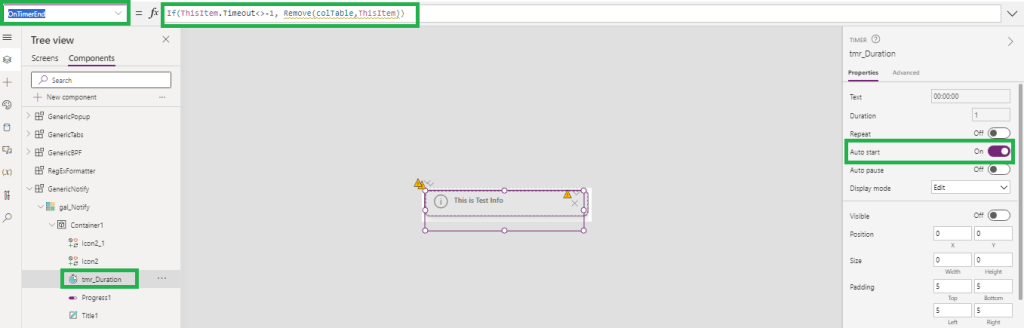
To set timeout property of notification, use timer.

Set timer duration with current record timeout value-

If(ThisItem.Timeout>0,ThisItem.Timeout,1)

And onTimerEnd, notification should be vanished from screen. To do this, remove current record from collection colTable

If(ThisItem.Timeout<>-1, Remove(colTable,ThisItem))

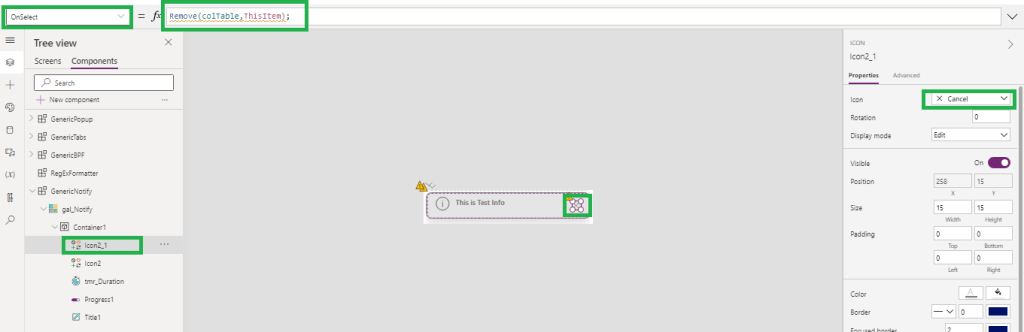
On click of Cancel, Notification should be closed. Similar to OnTimerEnd, remove current record from collection colTable.

Remove(colTable,ThisItem);

Set the container color based on the Icon color(which is depends on the NotificationType of current record).

ColorFade(Icon2.Color,0.8)

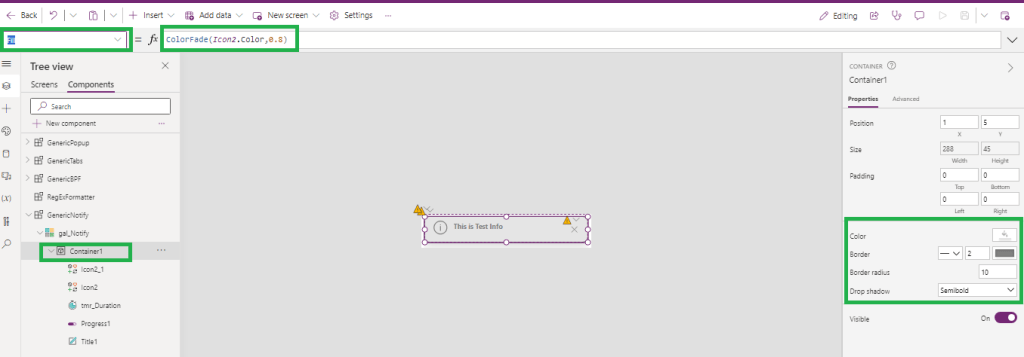
Set Notification Text in lable (Title1 as shown in image) and set color similar to Notification Icon.

Text –

ThisItem.Text

Color –

Icon2.Color

After doing some basic setting on each control in custom control, save it and use it in app.

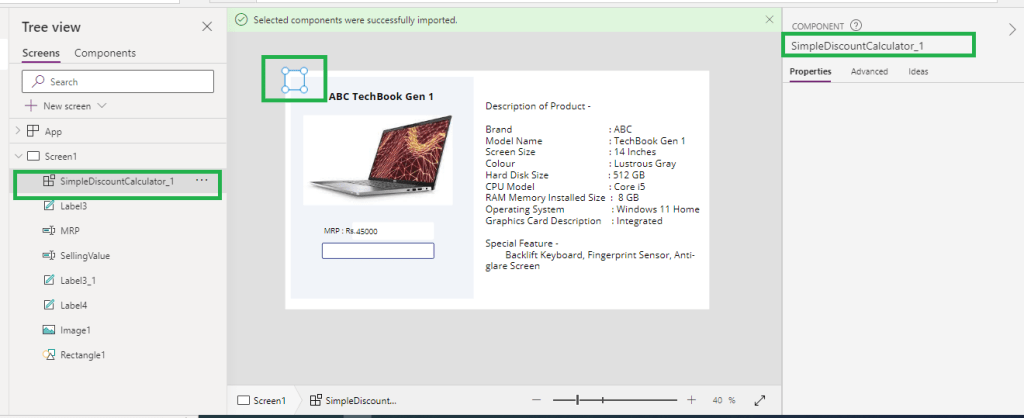
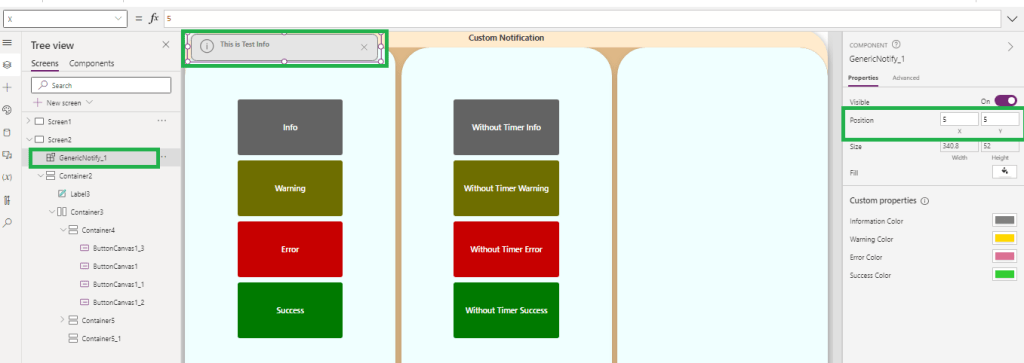
Add Custom Control in App and set the position where you want to show the notification.

  1. For Top-Left set X=5 and Y = 5
  2. For Top-Center Set X = (Parent.Width/2)-(Self.Width/2) and Y=5
  3. For Top-Right Set X= Parent.Width-Self.Width -5 and Y=5
  4. For Bottom-Left- X=5 and Y= Parent.Height-Self.Height-5
  5. For Bottom-Center X = (Parent.Width/2)-(Self.Width/2) and Y= Parent.Height-Self.Height-5
  6. For Bottom-Right X= Parent.Width-Self.Width -5 and Y= Parent.Height-Self.Height-5
  7. Height of the Control should be based on the number of Notification, so Height=52*CountRows(colTable) . 52 is Notification height.

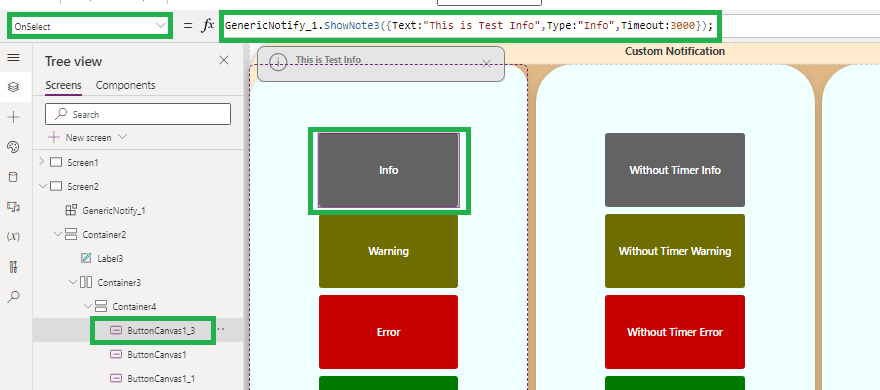
In App, Call the ShowNote3 function and pass the record while calling function.

Suppose on Button onSelect event I want to show information.

GenericNotify_1.ShowNote3({Text:"This is Test Info",Type:"Info",Timeout:3000});

If you don’t want to hide notification automatically pass Timeout : -1

GenericNotify_1.ShowNote3({Text:"This is Test Info",Type:"Info",Timeout:-1});
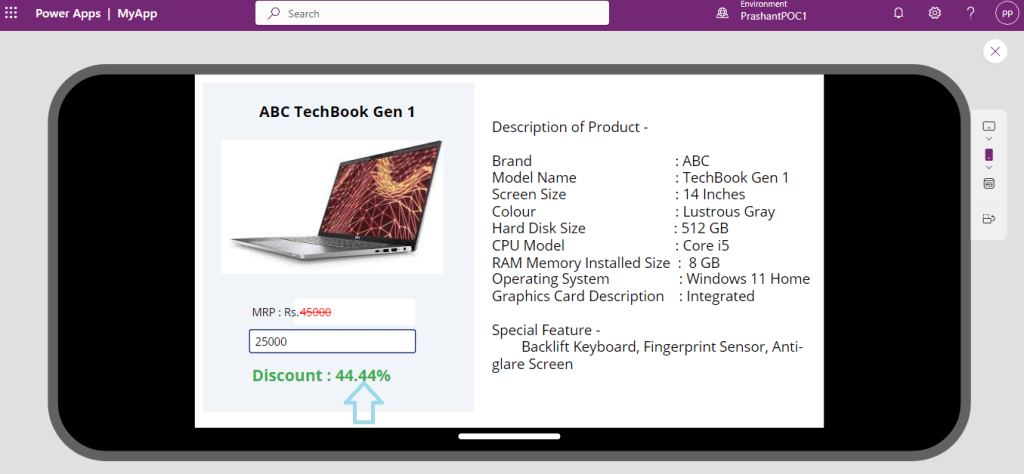
Demoes below-

Top-Left
Top-Center
Top-Right
Bottom-Right

Now this Custom control can be reused in multiple screens and apps.

Hope this will help…
Enjoy MS CRM!!!

Follow on Facebook- FB: MSCRM16Tech

Dynamic Regular Expression (RegEx) pattern match using IsMatch(), Match() in PowerApps

What is Issue?

PowerApps has few functions like IsMatch(), Match() functions to validate the fields using RegEx. I have to validate the phone numbers, postal codes on lots of screens using RegEx. There are lots of screen where I have to validate fields with similar Regular Expression (RegEx).

I wrote the IsMatch() function on each error message label text and visible event on respective text fields to show error message if input text is not as per RegEx. I published the app when ready.

Later, I got the updated ReqEx from business. Here, I realized the IsMatch() function is having constant RegEx and I have to update each function manually again.

I thought of declaring the variables for each RegEx OnStart of App or OnVisible of main screen. When I tried putting variable in place of RegEx string, formula started showing error and not allowing me to use the already declared RegEx variables.

The Reason-

IsMatch() function do not support dynamic RegEx directly. Only constant or Enum allowed as RegEx pattern in IsMatch() , Match() functions.

Solution-

PowerApps has lots of capabilities for fast and quality application development. But there are few limitations on PowerFx/Functions available in PowerApps. While developing the app, one challenge every developer faces – Dynamic and optimized coding to make application much configurable with very little changes.

Suppose you have 10 screens in power app application and each/most of the screens are has same functionality or same validations. So you have to repeat the each steps manually on each screen or you can create reusable component for the same.

Let’s see how we can make IsMatch(), Match() functions to support dynamic RegEx.

Here I am going to create simple custom component.

Let’s take Example –

I have to validate phone number in multiple screens with below pattern –

^(\+\d{1,2}\s?)?\(?\d{3}\)?[\s.-]?\d{3}[\s.-]?\d{4}$

It will accept only below phone number formats –

123-456-7890
(123) 456-7890
123 456 7890
123.456.7890
+91 (123) 456-7890

Follow the below steps –

  • Create Simple PowerApps custom component “RegExFormatter” with a text input
    • RegEx
  • IsMatch() function Supports only Text as RegEx pattern. Hence, create a function output with Text return type
    • GetFormattedRegEx
  • You can refer the blog for creation of custom component –MS Dynamics 365 : Component Library- Reusable Components for Power Apps
  • In output function GetFormattedRegEx() add the below code-
With( { expression : "\w*" }, Self.RegEx & expression )

“\w*” is to validate any word and appending it with input RegEx will help to convert any RegEx into Text format.

  • Publish the custom Component.
  • Import RegExFormatter component in App/Custom Page
  • Now Let’s start configuring variables in App/Custom Page.
  • OnVisible of Screen or OnStart of App/Custom Page declare the variables
    • Global Variable – var_PhoneRegEx : with pattern –
      • ^(+\d{1,2}\s?)?(?\d{3})?[\s.-]?\d{3}[\s.-]?\d{4}$
    • Context Variables – var_FieldChanged : to identify changed field
  • Configure RegExFormatter component in App/Custom Page-
  • Add input parameter
    • RegEx = var_PhoneRegEx
  • Update OnChange event of the phone fields on each form to update context variable –
    • var_FieldChanged = “Account_Phone” (you can assign any text value to identify the OnChange event for respective error message field.)
  • Update error label Text and Visible event by calling the component function output in IsMatch() function. Example-
!IsMatch(DataCardValue2.Value,RegExFormatter_1.GetFormattedRegEx(),MatchOption.Complete)
  • IsMatch() will treat returned value of function RegExFormatter_1.GetFormattedRegEx() as constant text.
  • Yay.. No error this time for IsMach() function.
  • Save and test the app.

In case there is change in RegEx for particular validation , we can just update RegEx variables in OnStart or OnVisible events only.

Now we have created truly dynamic RegEx matcher and resolved the constant string issue.

You can use the same for gallery control if you have the input boxes and validations using RegEx. You can handle error visibility in gallery by adding extra column (isValid) in gallery data source. You have to configure the variable properly.

Hope this will help…
Enjoy MS CRM!!!

Follow on Facebook- FB: MSCRM16Tech

MS Dynamics 365 : Component Library- Reusable Components for Power Apps

What is Issue?

Microsoft Dynamics 365 is moving towards no-code and low-code strategies of software development and providing the abilities to create power apps, CRM, ERP systems and portals in no time. But while developing Apps for business use cases, developer faces lots of repetitive scenarios on multiple places in same app or different app. Some formulas developer need to write again and again. Similarly, he/she needs to design same screen again and again.

Suppose, App is fully developed and live. Business want to change some formula which is used at 100 places in App/Apps. How to handle this?

The Reason-

Formula/component is created at each place manually or by copying the from some other place. It will be difficult to manage the change at 100s of places in App/Apps for single requirement change by business.

Solution-

Microsoft Power Apps provides the way to create component library which can be utilized across the apps. Each library can have multiple components. Using Component library developer can create common screens, functions, actions, etc.

Let’s see the Scenario –

I am developing the app for vendor/retailer who sells electronic Item. The vendor/ retailer is selling the used/renewed products with the prices decided after product renewed. Each item is having it’s price from brand. Now vendor want to show the customer how much discount (over actual price of brand new product) customers are getting if they purchase product from the vendor/retailer.

The same vendor is having different app where he is having same requirement for his bicycle shop where he is selling renewed bicycles with new prices.

Now lets develop the common component which can be used for both the apps. So let’s create the reusable discount function.

Go to Power Apps Maker and navigate to Apps, change tab to Component Library and click on +New Component Library-

I have created the “DiscountCalculator” component Library and renamed the Component “SimpleDiscountCalculator” . This component name will be used in Apps.

I just need to create the reusable function for now, So I am not adding any controls on the component and reducing the size of component. It will make it hardly visible and easily draggable on the app screen .

For each component, it is possible to pass the data from app or to the app. This way component can generate response based on the input received from the app screen.

For my use case I have to create the reusable function only. So I am adding custom property-

Currently some behavioral properties of the components are in Experimental mode.

I need to enable the output property of type Function, Event, Action. To enable these properties, go to Settings -> Upcoming features -> Experimental and turn on “Enhanced component properties” .

It will start showing the new options in create Custom Property window-

I am setting the property as output, type as function with two parameters for formula of discount % –

  1. Original Value – type Number
  2. Offered Value – type Number

Once Custom Property with Name “Discount” is created, its time to set the formula on property-

  1. Click Discount on Custom properties section
  2. Change event to Discount
  3. Set formula when event/function is Discount

My Function is ready. I am saving and publishing it.

My custom component library is ready to use. I am going to use it in my app for electronic product selling app-

First I have to import the component library in my app. I am adding the component by clicking on “+Insert” -> Get more Components.

It will show all the components available in the Dataverse environment. If component is not visible in import window, try to refresh the list. Still not visible, make sure component is available in environment and published.

Once the component is imported, it will start showing in insert control list. Now I am selecting my “SimpleDiscountCalculator” component to add it on form.

Component is added on form now. I am adding the label “discountLabel” on screen to show discount calculated. I already have 2 controls which shows the product’s actual price “MRP” and second to enter the “sellingValue” which will be populated by retailer and non-editable to customer.

“OnChange” event of “sellingValue” control, I am using variable to set the value that is calculated using custom component and same variable to display on “disocuntLabel” control.

You can see, I have used SimpleDiscountCalculator_1.Discount() as the function.

Function is working as expected-

That’s it .. I can use the same component in my another app requested by vendor/retailer.

If vendor want to change the discount calculation, I can simply enhance logic in component and update references for this component on apps.

Below are property type which are in experimental mode. Details are available on Microsoft Documentation.

Hope this will help…
Enjoy MS CRM!!!

Follow on Facebook- FB: MSCRM16Tech